The COTBLEDTCID approach to object detection and pose estimation, Part V – Circles detection

Introduction

Let’s do a summary of what we have done so far:

  • COT: colour thresholding. We separated yellow objects from the rest.
  • BLED: blob edge detection. We retrieved the bottom edges of blobs (pawns).
  • T: transformation. We transformed the image’s pixels into game field points (aka. pixels to meters).

And the last step CID: Circles Detection.

As you may have already noticed, pawns and tower of pawns are in fact circles when viewed from above. Therefore, the bottom edges we found with BLED are also circles’ segments when transformed into game field coordinates (step T). This is the property we’re exploiting below.

Continue reading

The COTBLEDTCID approach to object detection and pose estimation, Part IV – Transformation

Introduction

With the last step we know where the bottom edges of the pawn are located on the image, we just need to find a way to transform the coordinates of those pixels into game field coordinates.

Given a point p' from the Image plane, we’d like to transform it into p from the Game field plane. We can write:

p = H \cdot p'

We observe that straight lines are kept straight, thus H is called the homography matrix which can be computed if at least 4 different matching points are given for both planes. (p1 \leftrightarrow p1', p2 \leftrightarrow p2', p3 \leftrightarrow p3', p4 \leftrightarrow p4')

HomographyIt’s worth noticing that both p and p' points are given in homogeneus coordinates.

Continue reading

The COTBLEDTCID approach to object detection and pose estimation, Part III – Blob Edge Detection

Introduction

There is still too much information we do not need on the B&W image we got on the last step. That’s why we need to extract the features we do need. One way of accomplishing this is by performing a connected component analysis in binary images, aka blob labelling. However as you’ll will see, this method is not completely adapted to our needs, so a new approach is proposed: Blob Edge Detection.

Continue reading

The COTBLEDTCID approach to object detection and pose estimation, Part II – Colour Thresholding

Introduction

Images are usually too complex to be treated by computers as is. In most cases, they have to be enhanced and simplified before any algorithm can be applied on them. Fortunately for us, the rules of the contest specify that yellow is the colour of pawns and figures we are looking to detect.

Generally speaking, the purpose of Colour Segmentation is to extract information from an image by grouping similar colours. In our algorithm, we implemented colour segmentation by thresholding yellow colours, that is to say, the computer builds a black and white image from the original image where white colour represents yellow colour and black is everything else. This is called colour thresholding.

The problem is, as you may have already guessed, the notion of “yellow” colour. For humans, it is relatively easy to tell whether a colour belongs to a group of colours, but for computers this is a whole different story.

Continue reading

The COTBLEDTCID approach to object detection and pose estimation, Part I – Preface

Introduction

A fancy acronym that stands for the process of COlour Thresholding, Blob Edge Detection, Transformation and CIrcle Detection used for locating 3D objects on a plane. The next series of posts will explain the software algorithms used by ClubElek on 2011 to achieve computer vision. The problems we faced, the solutions we implemented and most importantly what we have learned by doing this project.

These posts are targeted to a wide audience with some background in maths and preferably some background in computer vision. Mostly because there are some maths and magic behind the algorithms used, but I’ll try to keep them as simple and clear as possible. Should you have questions or remarks do not hesitate to comment !

This software was designed to detect “pawns” and “figures” defined by the Eurobot 2011 rules and was demoed during “Industrie Lyon” from 5 april to 8 april 2011. Before continuing reading this post you should read the summary about the rules of the contest so you don’t get lost.

Besides the 5 previously mentioned steps, 2 other steps were necessary before attempting any computer recognition: terrain calibration and colour calibration. These 2 processes will be explained on separate posts as they are far more complex than the COTBLEDTCID itself.

After the pawns’ positions had been detected by the means of COTBLEDTCID, they were sent wirelessly to the robot through a XBee connection.

Additional requirements

  • The software should be used in a real-time environment. The fastest the algorithm, the better.
  • The software should be easy to use and fast to configure. (Teams have only 1 minute and 30 seconds before a match to completely set up the robot and its peripherals).

Hardware set-up

  • A Fit-PC-2 disk-less and fan-less computer running a customized ubuntu version controlled through ssh.
  • 3 identical Microsoft LifeCam Cinema webcams. Why 3 cameras should you ask. Well, during a match, there are two robots that constantly move around the table and obfuscate large parts of the terrain, with 3 cameras chances are we see most of the objects on the playing table at any time.

Assumptions made

  • Light intensity remains constant during the match and after calibration.
  • The cameras do not move during the match.

Both assumptions resulted to be inaccurate but did not affect the result as the detection and pose estimation algorithm is fairly robust.

Shiny pics

What the computer sees (note that the robot’s game field wasn’t entirely finished by the time):

What the computer sees

What the computer understands: (compare the pawns’ position in both images. You may use the red top corner or the black area at the bottom of the image as a reference)

what the computer understands

It’s fairly accurate isn’t it ?

What’s next

In the next section I will explain how the Colour Thresholding works and why we need it (COT for short).

Brand new videos !

It’s a pleasure to announce the immediate availability of 2 new videos.

The first one was originally made to recruit new members for the ClubElek’s team. It was later modified to be part of a CD we offer to our sponsors. I really think the video made it’s purpose as there’s a troop of new people coming each week to our chamber of secrets ( also known as the ClubElek’s cave) 😉

The second video was made just for fun :P. It’s an assemble of a recorded match made of three different angles.

Now go get some popcorn, take your favourite seat and enjoy ! (PS: Sorry if you don’t completely understand the first video because the text is in French).

A new year for ClubElek

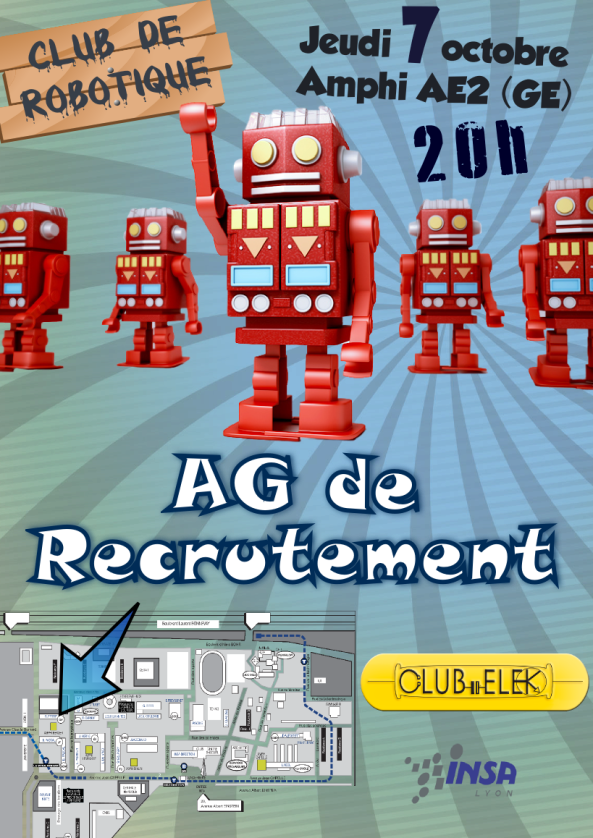
A new year starts for Clubelek, that’s why we’ve created a poster to recruit the most ambitious, the most creative and the most motivated people out there. Hope you like it :

Ag de Recrutement, ClubElek 2010

Click the image to see it in full resolution.

If you’re interested and you live nearby, don’t hesitate. Come and see what Clubelek is all about !

I cant’ finish this post without thanking Matthieu for his ideas and his advice.

Sources : The very cool robot toy was made by RayKit Designer

Coupe de France de Robotique 2010, summary

This week was the culmination of months of work. La coupe de France de Robotique is the event where all ~160 teams gather themselves to show off their creations.

Of all 121 teams that were approved to compete, ClubElek finished in 9th place !! Which isn’t bad at all ;). The final results are here.

It wasn’t easy though, the final phase of the development was much slower than planned, and when we arrived to the first match, we had a non fully tested robot.

We worked hard all week and even if we thought everything seemed was ready after touching everything up for the second match, the robot didn’t behave as expected until the 6th match !!

Believe it or not, it was the first match where we did our highest score : 1800 points.

The video of the first match :

Continue reading

Coupe de France de Robotique 2010

The next annual French Robot Cup has arrived !! A lot of development has been going on for over several months, lots and lots of line of code have been written and debugged. It’s now time to show the world what we’ve done : [name placeholder ;)].

The robot is capable of :

  • Knowing the relative position of the opponent’s robot and acting accordingly. For the time being, the robot stops itself when the other robot is too close.
  • Creating complex movements : it can turn in any direction, go forward and backward from 3mm up to several meters. It can also move in polar coordinates (this gives the robot the ability to do curved trajectories).
  • Finding its way through the terrain : the path-finding allows the robot to use several way-points to arrive to its destination. This way, we’re sure to avoid every fix or dynamic object.
  • Estimating its position by using odometry.
  • Detecting the contrast of nearby objects (up to 7cm), in this case the white or black corns.
  • And many other things 😉

A photo of the robot almost finished :

Continue reading